Saturday, August 17, 2013

Back to School SAAAALE!!!

In the words of Billy Madison, "Back to school! Back to school! To prove to Dad that I'm not a fool. I got my lunch packed up, my boots tied tight, I hope I don't get in a fight. Ohhh, back to school! Back to school! Back to school!"

This has been a crazily, insanely, BUSY week...and we only had one voluntary workday! Of course the Perfectionist Polly in me had to be at school every. single. day. But I'm so glad that I did. My new room is pretty much finished {pics to come next week!} so now all that's left is planning. On the schedule next week is pre-planning, meetings, and Back to School Night!! I'm so excited to see those little babies! Ok, they're 5th graders, but still babies none-the-less ;)

In the meantime, check out my TpT store for a well deserved SALE! All items in my store are 20% off today. Type in the promo code to get an EXTRA 8% off, tomorrow and Monday only! Thank you TpT for throwing such an awesome sale! Teachers need all the sales we can get ;) Can I get an amen?
Have a relaxing weekend!

post signature

Tuesday, August 6, 2013

FLASH FREEBIE!

As I was working in my classroom today I came up with a new idea for my job chart. I used polka dot pockets last year, but wanted something to fit my Bright Colors classroom theme.
TaDa! Bright chubby pencils from Creative Clips with the job written on them! Only until midnight, this item is FREE at my TpT store! Get it now so your kiddos can be "penciled in!"

post signature

Sunday, August 4, 2013

DIY Napkins Tutorial

This is totally non-school related, but good to blog about none-the-less :)
Is there anyone else out there who uses cloth napkins? For whatever reason it seems that they just aren't used anymore. Growing up we always used cloth napkins. I think I can remember about three times {if that!} when we used paper napkins. To me, cloth napkins were "normal." I thought everyone used them. But when my friends ate supper at our house they all seemed confused and a bit skeptical of using pretty-printed fabric to wipe their mouths. 

There are many good reasons to use cloth napkins and I applaud anyone who uses them. 
1. Economical: For my husband & I, paper napkins would cost about $40/year. That's assuming we would use 1 napkin each for breakfast, lunch, & dinner. Obviously if you have children the number is going to increase. Saving $40 might not be a big deal to some people, but for my family a penny saved is a penny earned! 
2. Environmentally Friendly: Cloth napkins are reusable. Simply wash, dry, fold, and use. 
3. Easy on the Eyes: Adding napkins can add a lot to your table-scape! {uh oh, there's the Sandra Lee jargon comin' out} Seriously though, how adorable are these?? 
I promise I'm not one of those soap-box people who is trying to convince you to use cloth napkins. In fact, I'm just the opposite. Usually I'm the one who smiles & nods in order to prevent an argument, haha! I really do understand why people don't use them. The purpose of this tutorial is to show you how easy, affordable, & fun it is to make cloth napkins for your family. So if you've ever thought about making them, but were unsure of where/how to start, this is for you :)

Step 1: Gather Your Equipment
Not pictured is an ironing board, sewing machine, and thread. You'll need those too :)
Step 2: Measure & Cut
1 yard of fabric will make {4} 16x16" napkins. I picked up this fun print on clearance at Hobby Lobby for $3! For 16x16" napkins, measure and cut 18x18" squares. {You want a 1" seam allowance on each side of your napkin for hemming.} Depending on how much fabric you have, you may decide on bigger napkins. However big/small you want them to be, add an inch on each side. Make sense?

Step 3: Hem & Pin
Now that your squares are cut, lay them on the ironing board, pretty side down. On one side, fold the fabric over 1/4" and press with your iron. Then on the same side, fold it another 1/4" and press again. That should make a total of 1/2" folded. 
Pin the fold in the middle to hold it in place. Sorry for the microscopic picture. I should've taken the picture from the other side to show you, but hopefully this makes sense!
Do the same thing for all 4 sides. Pin each corner to hold those in place, too! Measure your napkins to make sure they are 16x16".

Step 4: Cutting Corners {literally, not figuratively}.

Unpin one of the corners and cut about 1/2" off, like in the picture below.
Fold the cut corner about 1/4" inward.
 Now refold the left side on the seam that was created from ironing. 
And refold the right side so it creates a clean edge. Pin it back in place.
Sewing your corners like I did is optional. I prefer to do it this way because it prevents the fabric rom fraying and has a clean, professional look when it's complete. That's probably the toughest part of this project, but it's super easy once you get the hang of it.

Step 5: Sewing
Take your first napkin to the sewing machine and begin making a straight stitch down the fold, removing pins along the way.
Use the hem of your fabric and the presser foot as a guide. This will help create a straight line.
When it's done your sides & corners should look like this.
Cut any excess string from where you started/stopped sewing. There ya go! Four beautiful & reusable napkins for $3. My husband and I are still using napkins that I made a year ago, so these will last a while!
If you have any questions or need further details, please email me at contemporarysouthteacher@gmail.com. My button is on the sidebar. Happy sewing!

post signature

Friday, August 2, 2013

Classroom Renovations

Jeeze Louise this has been a busy week! On Monday I began the dreadful process of moving classrooms. I definitely can't complain about being bored for the rest of summer! I spent two full days slaving away {with the help of some wonderful colleagues!} and STILL have a ton to do. Before you scroll down and look at pictures, let me give you a heads-up about my new room:

1. It's huge! Seriously. I think it's the largest in the school.
2. There's no outside door, which means I can't go on the weekends and I have to leave before the alarm sets at 6:00. I still haven't decided if this is good or bad, haha.
3. I have a SmartBoard. It's smaller than my last one, but I'm not complaining.
4. I also have a large CHALKBOARD!!?? Do they even sell chalk anymore? I guess I need to make "eraser banger" as a classroom job ;)
5. I found textbooks from...get ready for it...the 80s! Those will be the first things to go.
6. It's definitely not lacking in wall space. They will be filled up with Top Down Topic Webs, Frayer Models, & 2-Column Notes in no time!

Here are some pics, but please keep in mind that it's still a gigantic humongous enormous work in progress!
Day 1
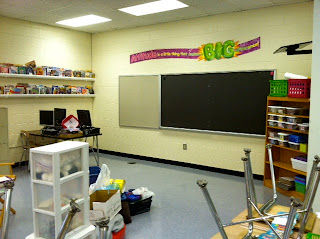
View from the door. The room extends out more on the right.
Here's the extension. You can see the filing cabinet in both pictures to get an idea of how big it is. There are going to be big changes in this area!
1. The gutter-shelf books aren't mine, so those will be gone. 
2. The computers will be moved to the wall next to the small group table. In its place I'm putting a small reading area with bean bags and a carpet.
3. The wooden cubbies (no picture yet) will be lined up underneath the chalkboard.
4. The chalkboard/mini bulletin board will be turned into our math & science word walls.
5. The bookshelf on the right has our art supplies. The cabinets in this room are really narrow, so I'll have to store them here.
 Small group table and my personal area. See both the desks in the picture? There's one on the left with basal readers and a wooden one on the right. Those will not be there when I'm finished. And take a look at the different paint colors on the wall. YUCK! I did something on Day 2 to fix it :)
My chalkboard! Hahaha, I never thought I would have to say that. I'm going to keep the daily schedule on the left with these schedule cards from The First Grade Parade. Our "I Can" statements and math tasks will go on the right.

Day 2
Small group area tidied up! The bookshelf is going to be for math & science resources, planning materials, and student info. It's not organized in any fashion yet. I added a fake bulletin board above it to cover the ugly spot on the wall! Easy fix :) You can also see my paper filer in the corner!
Behind the small group table. Sorry for the poor picture quality. The bookshelf has all my supplies, but I'm not liking how it's organized. It will be fixed soon. The baskets on the window are labeled with the days of the week. I will keep daily work in these. Since I'm teaching two groups of kids, I will have two colored file-folders to separate their work. 
I cleaned out the cabinets, but haven't decided what to put in here yet. I may use it to store math/science books and interactive notebooks. The two pink baskets are for Thursday Folders and Homework, and the purple bin is for their lunch cards. I made bright labels for these, but haven't attached them all yet.
Math manipulatives. I still need to make labels for the baskets. On the bottom I have clipboards and whiteboards. At first I was hesitant to keep our manipulatives in baskets without lids, but I think 5th grade should be able to handle it ;)
Volume level chart. I can't remember where on TpT I got this from, but they are awesome. We use it all the time! Anytime the kids go above the specified volume, I put a strike on the board. After 3 strikes they must work independently for a short period of time. Once they have settled down they can continue at a Volume 1.
Next to the Volume Chart is going to be our Math Rotation Board. I'm still working on a plan for this so I can include both classes up here. Any ideas?? Below that are small group art supplies. Some of the baskets still aren't completed, but you can see how I did that project here.
This will be our class news board. I'm going to post "Brilliant Work", our class newsletter, and a monthly lunch calendar.
Art supplies organized and labeled! The labels were a free download on TpT, and of course I can't find the link! But seriously, if you search on TpT there are literally thousands to choose from. I also covered coffee tins with chevron scrapbook paper! The plastic bin on the left will be moved.
My teeny, tiny, one-and-only whiteboard! I'm going to put the daily agenda for each class here so the kids will know exactly what to expect each day.

Still a lot to do, but luckily I have time. What have you done to your classrooms to get ready for next year?

post signature

Tuesday, July 30, 2013

Back to School Read Alouds

Good morning world! Today I'm linking up again with The Teacher's Chair for another "Show us your...." linky party. First let me say, though, that I really enjoy reading her blog. If you haven't already, take a minute to check it out. She's got some really great ideas.

Here is today's theme.
A lot of upper elementary teachers don't read books aloud to their kids anymore {sad face!} Last year I taught 4th grade and got them hooked on read-alouds! They initially thought they were "too big/cool/old" to listen to picture books, but they grew to love them. Read-alouds, when used properly, serve an important purpose for any grade. There are a lot of rules and procedures that students learn during the first week of school, and picture books are a great way to reinforce these principles. Here are my go-to stories.
Can't wait to read these in a few weeks!!!!!

post signature

Monday, July 29, 2013

Monday Made It and a New Link

Many of you that I follow are going back to school next week, and I just have to ask....What's up with THAT!? I still have 3 1/2 more weeks people. That's 3 1/2 more weeks of crafting, procrastinating, and just being plain lazy. Ok, I'd be lying if I said that I enjoy being lazy for that long. I'm actually looking forward to school starting so I can get back into a solid routine. I loove summer, but I'm ready for some hustle & bustle. 

Alright, time to link up with Fourth Grade Frolics for some Monday Made Its.
Library Helper Book Bags
Next year I am implementing a new classroom job: Library Helpers. I had one of these last year, but their only purpose was to keep our classroom library organized & clean. Confession: I was NOT always a good role model for proper library etiquette. There were many times when we were rushing out the door and I would throw place a book in some random basket to save time. But this year will be different! I read The Book Whisperer by Donalyn Miller this summer and have a completely different perspective on my classroom library.

Our Library Helpers will have an important job. Not only will they keep our classroom library organized, they will also be responsible for taking everybody's books to the library during Specials on Thursday. Instead of wasting time for the kids to get out their library books on Thursday {which is usually panic mode for a few because they can't find them in their black hole of a desk}, the kids will drop off their books Thursday mornings in these books bags. 
And the library helpers will carry them to the library :) I got these bags for $1 each at Michaels and dressed them up with some leftover ribbon from my small group bins
Monster Themed Daily 5 Posters
Here's a freebie for all you monster lovers out there. It's a pack of Daily 5 posters for your room. There are two types in here, depending on what system you use: full-size posters for a clipchart and smaller cards for a rotation board. Click the picture to download.
I'm also linking up with The Teacher's Chair today for something new :)
Today's theme is lesson planners. This is actually the first product I ever made for my TpT store! Since then I've completed another planner, so I'm attaching both of them. The first is a gray/pink chevron theme and the second is rainbow/bright colors. Click the pictures to download a preview and/or purchase at my TpT store.
Make sure you check out both blogs for some last minute inspiration. Enjoy the rest of your week!

post signature